Frequently Asked Questions

The differences between the standard 50R and the 50R with SOUND by Harman Kardon are:


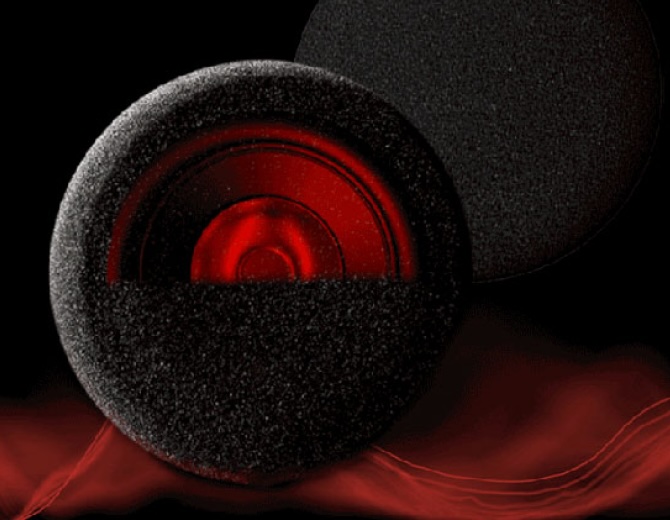
The new speakers that come with the 50R with SOUND by Harman Kardon offer a marked increase in audio quality surpassing that of any other motorcycle communication system on the market.


The design of the boom and wired boom microphones that come with the 50R with SOUND by Harman Kardon have been redesigned to a cylindrical shape to reduce incoming wind noise to provide a robust performance for voice communication while riding. The size of the wired microphone has increased to provide more protection from incoming wind noise. Additionally, the boom and wired boom microphones have been changed from uni-directional on the standard 50R to omni-directional on the 50R with SOUND by Harman Kardon.


The equalizer presets for the 50R with SOUND by Harman Kardon have been fine tuned to deliver an unmatched audio experience. The presets included in the 50R with SOUND by Harman Kardon are:

  • Music Balanced (default)
  • Music Enhanced
  • Voice
  • Bass Boost
  • Treble Boost


The warranty period for the 50R with SOUND by Harman Kardon is 3 years. The warranty period for the standard 50R is 2 years.

The Mesh Intercom feature on the 50R (referred to as Mesh 2.0) has been improved compared to the Mesh Intercom 1.0 that was introduced with the 30K. Mesh 2.0 features a robust connection, enhancing communication. 6 people can speak at the same time while a limitless number of participants can listen in. Communication response time has been improved by 25% from Mesh 1.0. Mesh 2.0 also introduces brand new ways to connect with other riders on the road. With Multi-Channel Open Mesh Intercom, you have 9 channels available, an industry first! Switch between channels to converse with different groups participating in Mesh communication. Or, switch over to Group Mesh to create a private group and have up to 24 participants.

Here are the differences between the 50R and the 50S:

  • The 50S uses Sena's tried-and-true Jog Dial with a new design to operate the headset. The 50R uses Sena's 3-button design to operate the headset.
  • The 50S can be mounted on a helmet using the included clamp kit. If the clamp kit can't be equipped for any reason then the Glued Surface Mounting Adapter can be used to mount the headset on the outside of the helmet. The 50R can be mounted on a helmet using the included hook and loop fasteners, double sided adhesives or the clamp kit.
  • The 50S includes 3 types of microphones, the boom microphone, the wired boom microphone and the wired microphone. The 50R includes 2 types of microphones, the wired boom microphone and the wired microphone.
  • The 50S has a slightly larger battery than the 50R.
  • The talk time for the 50S is 9 hours in Mesh Intercom and 14 hours in Bluetooth Intercom. The talk time for the 50R is 8 hours in Mesh Intercom and 13 hours in Bluetooth Intercom.
  • The clamp kit on the 50S includes an AUX port for a non-Bluetooth MP3 player. The 50R does not include an AUX port.
  • The 50S clamp kit includes a built-in 3.5mm earbud port so that you can use your own earbuds for audio rather than the included high quality speakers. The 50R does not include a built-in 3.5mm earbud adapter. However, the 50R is compatible with the 10R Earbud Adapter Split Cable (part #: 10R-A0101) so that you can use your own earbuds for audio rather than the high quality speakers.
  • The 50S can activate an internal microphone to activate the Ambient Audio feature by double tapping the Ambient Mode Button on the bottom of the clamp kit. The 10R does not have the Ambient Audio feature.
  • The 50S can use the Ambient Mode Button on the bottom of the clamp kit to activate the Group Intercom feature to create a multi-way intercom conversation. The 50R can activate the Group Intercom feature by tapping the Plus (+) Button and the Minus (-) Button once at the same time.
  • The main unit of the 50S can be detached from a helmet when attached using the clamp kit or the Glued Surface Mounting Adapter for charging or storage. The main unit of the 50R cannot be detached if is attached to a helmet using the double-sided adhesive. However, the main unit of the 50R can be detached from a helmet if it is attached using the hook and loop fasteners or the clamp kit. The speakers and the microphone for the 50R need to be disconnected from the wiring so that the main unit of the 50R can be detached.
  • The speakers for the 50S and the 50R use different connectors which means that they are not compatible with each other.

Yes. With the necessary firmware version installed on the 30K, Momentum EVO or the +Mesh, the 50R will be able to talk to someone with one of these devices through the Mesh Intercom in an Open Mesh or in a Group Mesh. For the +Mesh, only Channel 1 in Open Mesh mode can be used to talk to someone with the 50R in Mesh Intercom mode.


The firmware update for the 30K, Momentum EVO and +Mesh will be released on May 1st, 2020.

You can view and download the full User's Guide for the 50R via the link below. 

50R User Guide | Sena

By simply pairing your phone with your headset, you can use the Sena
Motorcycles App for quicker and easier set up and management.
• App Features: Mesh Intercom, Bluetooth Intercom, Music, Device
  settings, Quick Start Guide, User’s Guide, and Rider Mode.
• Download
- Android: Google Play Store > ‘Sena Motorcycles App’
- iOS: App Store > ‘Sena Motorcycles App’

mceclip0.png

The Sena Device Manager allows you to upgrade the firmware
and configure its settings directly from your PC or Apple computer.
Download the Sena Device Manager from sena.com.

Press and hold the Center Button and (+) Button for 1 second at the same time to turn the headset on or off.

Powering On                                                    Powering Off

mceclip0.png

Charging the Headset

mceclip0.png

mceclip1.png

You can raise or lower the volume by tapping the (+) Button or the (-) Button. Volume is set and maintained independently at different levels for each audio source (i.e., phone, intercom), even when the headset is rebooted.

Volume Up                                                          Volume Down

mceclip0.png

Pairing When the 50R is Turned Off

1. Press and hold the Center Button and (+) Button for 3 seconds when the 50R is turned off.

Phone Pairing

mceclip1.png

2. With your mobile phone in Bluetooth-pairing mode, select Sena 50R in the list of devices detected.

3. If your mobile phone asks for a PIN, enter 0000.

mceclip2.png

Pairing When the 50R is Turned On

1. Execute Phone Pairing in the Configuration Menu.

Phone Pairing

mceclip3.png

2. With your mobile phone in Bluetooth-pairing mode, select Sena 50R in the list of devices detected.

3. If your mobile phone asks for a PIN, enter 0000.

mceclip4.png


1. Execute GPS Pairing in the Configuration Menu.

GPS Pairing

mceclip0.png

2. With your Bluetooth device on the GPS navigation screen, select Sena 50R in the list of devices detected.

3. If your Bluetooth device asks for a PIN, enter 0000.

mceclip1.pngmceclip2.png

You can start sharing music with one intercom friend using Bluetooth stereo music during a two-way intercom conversation and one participant of a Mesh. Both you and your intercom friend can remotely control music playback such as track forward and track back. If you start sharing music while Bluetooth intercom and Mesh Intercom are running at the same time, then music shared during Bluetooth intercom will take priority over music shared during Mesh Intercom. The Creator will send a request message to a headset connected during Mesh Intercom and will share music with the first participant that accepts the request.

Bluetooth Intercom Music Sharing

mceclip0.png

Answer a Call                                                     End a Call

mceclip0.png

 Reject a Call

mceclip1.pngmceclip2.png

When Mesh Intercom is enabled, the 50R will automatically connect to nearby 50R users and allow them to talk to each other by pressing the Mesh Intercom Button.

Mesh Intercom On                                        Mesh Intercom Off

mceclip0.png

 Channel Setting (Default: channel 1)

If the Open Mesh communication experiences interference because other groups are also using channel 1 (default), change the channel. You can select from channels 1 to 9

mceclip0.pngmceclip1.pngmceclip2.png

Creating a Group Mesh

Creating a Group Mesh requires two or more Open Mesh users.
              Open Mesh

mceclip0.png

1. Enter into Mesh Grouping to create a Group Mesh.

mceclip1.png

2. The headsets complete Mesh Grouping and automatically switch from Open Mesh to Group Mesh.

mceclip2.pngmceclip3.png


One of the members in an Existing Group Mesh can allow new members in Open Mesh to join the Existing Group Mesh.

New Members                               Existing Group Mesh and Current Members 

mceclip0.png  

1. One of the current members and a new member enter into Mesh Grouping to join the Existing Group Mesh.

mceclip1.png

2. The headsets complete Mesh Grouping. The new members will hear a voice prompt as their headsets automatically switch from Open Mesh to Group Mesh.

mceclip2.pngmceclip3.png


Up to three people can communicate via intercom with the headset simply by pairing their headsets.

Pairing with Intercom Friends

mceclip0.png

1. Press and hold the Center Buttons of two headsets for 5 seconds until you hear a voice prompt, “Intercom pairing”.

Pairing Headset A with Headset B

mceclip1.png

2. Repeat step 1 to pair with Intercom Friends C & D.

Last-Come, First-Served

mceclip2.png


You can start or end an intercom conversation with an Intercom Friend by tapping the Center Button.

1. Tap once for Intercom Friend 1.

Start/End with Intercom Friend 1

mceclip0.png

2. Tap twice for Intercom Friend 2.

Start/End with Intercom Friend 2

mceclip1.png

3. Tap three times for Intercom Friend 3. 

Start/End with Intercom Friend 3

mceclip2.png

Multi-Way Intercom enables conference-call-style conversations with up to three Intercom Friends at the same time. While MultiWay Intercom is in progress, mobile phone connection is temporarily disconnected. However, as soon as Multi-Way Intercom terminates, the mobile phone connection will be reestablished.

Starting a Three-Way Intercom Conference

You (A) can have a Three-Way Intercom Conference with two other Intercom Friends (B & C) by establishing two intercom connections simultaneously.

1. Pair your headset (A) with those of two other Intercom Friends (B & C).

Pair with Intercom Friends B & C

mceclip0.png

2. Start an intercom conversation with one of the two friends in your intercom group. For example, you (A) may start an intercom conversation with the Intercom Friend (B). Or, Intercom Friend (B) may start an intercom call with you (A).

Starting an Intercom Conversation with Intercom Friend B

mceclip1.png

3. Then, you (A) can call the second Intercom Friend (C), or the second Intercom Friend (C) may join the intercom by making an intercom call to you (A).

Starting an Intercom Conversation with Intercom Friend C

mceclip2.png

4. Now you (A) and two Intercom Friends (B & C) are having a ThreeWay Intercom Conference.

Three-Way Intercom

mceclip3.png


Group Intercom allows you to instantly create a Multi-Way Conference Intercom with three of the most recently paired headsets.

1. Go through intercom pairing with up to three headsets you want to have Group Intercom with.

2. Tap the (+) Button and (-) Button to begin Group Intercom. The LED will flash green and you will hear a voice prompt, “Group intercom”.

Start Group Intercom

mceclip0.png

3. When all of the headsets are connected together, everyone will hear a voice prompt, “Group intercom connected”.

mceclip1.png

4. To terminate Group Intercom, press and hold the Center Button for 5 seconds during Group Intercom. You will hear a voice prompt, “Group intercom terminated”.

End Group Intercom

mceclip2.png

Users can use the existing Bluetooth intercom and Mesh Intercom function at the same time. In this case, it is recommended to communicate with other Sena headsets via Bluetooth intercom connection and use Mesh Intercom between 50R headsets. A user who is in Open Mesh or Group Mesh when using Mesh Intercom is able to include up to 3 of their Bluetooth intercom friends. You can start a TwoWay Intercom conversation with one of your three Intercom Friends to include them in the Mesh.

mceclip0.png

FM Radio On/Off

FM Radio On                                                FM Radio Off

mceclip0.png

The “Seek” feature searches for radio stations.

1. Search for radio stations.

Seek Stations Forward                                        Seek Stations Backward

mceclip0.png2. Save the current station.

Enter Preset Selection Mode

mceclip1.png

3. Navigate through the preset numbers that you want to store.

Navigate Forward/Backward Through Preset Stations

mceclip2.png

4. Save the station in the preset number you choose or delete the station from memory.

Save Station to the Preset Number                  Delete Station from Memory

mceclip4.png

The “Scan” function automatically searches for radio stations, starting with the current station’s frequency, then up from there.

1. Scan for stations.
Start Scanning

mceclip0.png

2. The Sena tuner pauses at each station it finds for 8 seconds before moving to the next.

3. Save the current station. The station will be saved as the next preset number.

Save the Current Station

mceclip1.png

4. Stop scanning.

Stop scanning

mceclip2.png

Firmware Upgrades

The headset supports firmware upgrades. You can upgrade the firmware
using the Sena Device Manager. Please visit sena.com to check for the
latest software downloads.

When the headset is not working properly, you can easily reset the unit:

1. Locate the pinhole reset button at the bottom of the main unit.

2. Gently insert a paperclip into the hole and tap the Fault Reset Button with light pressure.

mceclip0.png

3. The headset will shut down.

mceclip1.png

To erase all of your settings and start fresh, the headset can be restored to factory default settings using the Factory Reset feature.

mceclip0.png